
There are a lot of guides that already exist out there in cyberspace, so I’m not preaching anything new. But if you don’t feel like sifting through search results, or you prefer static images rather than pausing a YouTube video each step, then maybe you might find this useful. Note: I’ve included screenshots for every step of the way, but don’t be put-off by thinking recolours take a lot of time or effort. The whole process actually takes around five minutes or less (depending on the size of your project). I’ve just tried to make it as thorough as possible.
Before you begin, make sure you have already downloaded and installed Sims 4 Studio (S4S) from here. There’s instructions on how to manually install at the download link, but I prefer automatic installation (because I’m lazy). You will also need an image editing program. I use Gimp, but you could also use Photoshop or some other program; it just means you will have to tailor certain steps to suit.
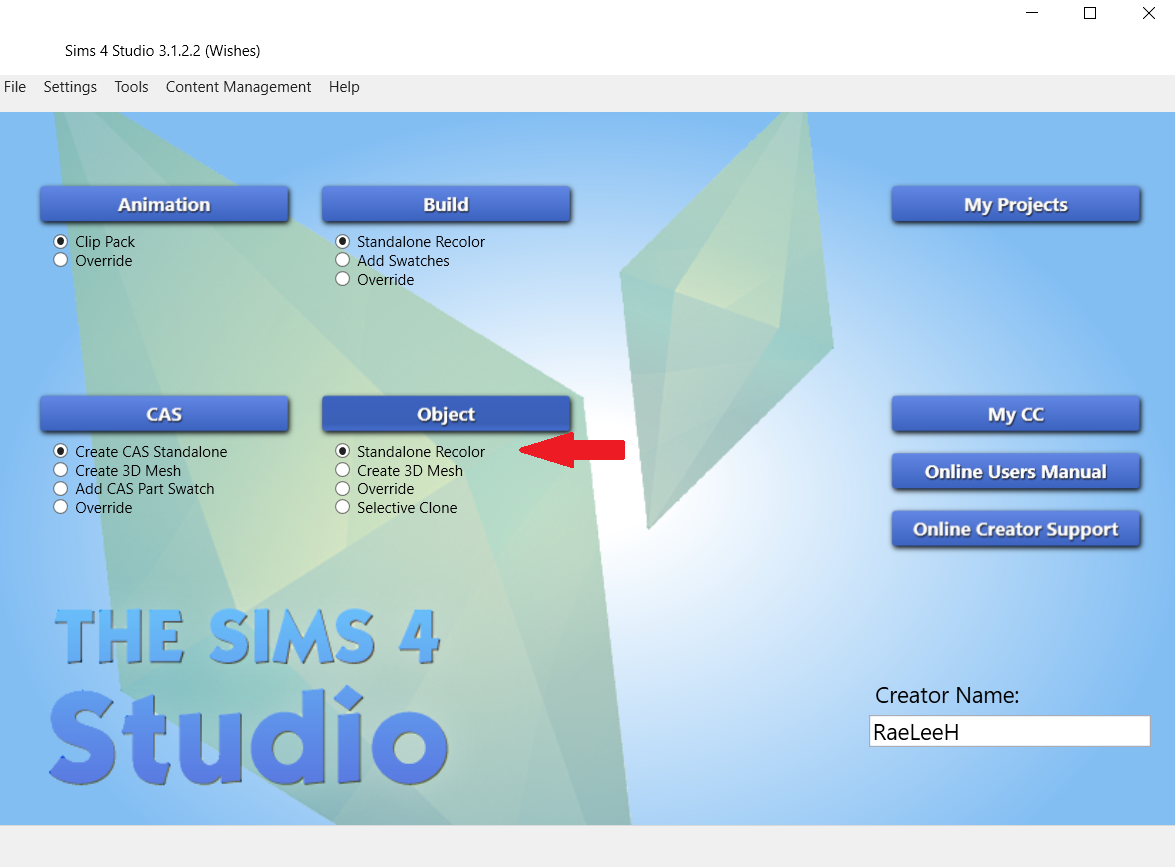
Step 1 – Open Sims 4 Studio. If this is your first time creating custom content, you will need to give yourself a creator name. You only need to do this once. Once you’ve done that, select Standalone Recolor, then select the Object button above it. Another window will open.

Step 2 – Scroll through the objects until you find the one you want. You can filter the objects by selecting the Game Pack button, or if you know the name of the object you can also type it in search. Then select Next.
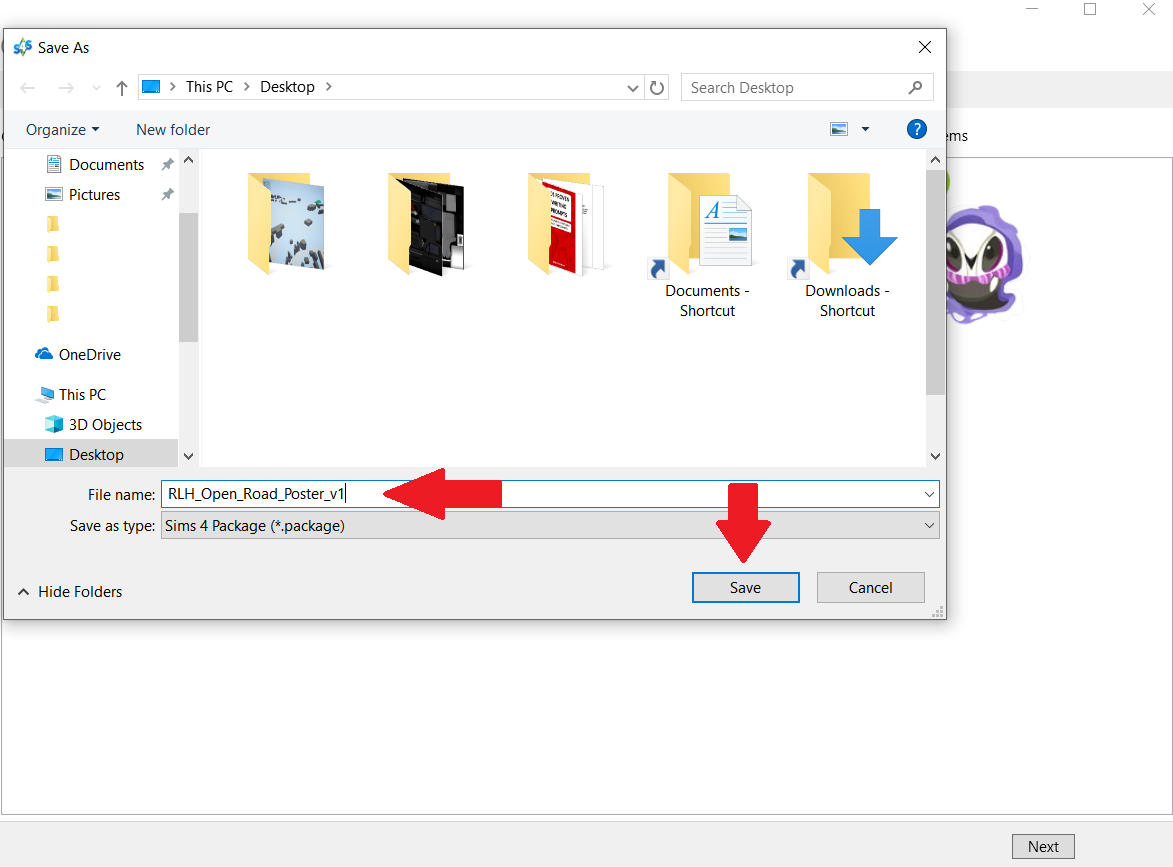
Step 3 – Give your project a name. This will be the name of the package file, NOT the name you see in the build/buy catalog. A general rule of thumb is to at least include your creator name (or some amalgam of it), as well as some sort of description of what your object is. For example, since my project is a poster I have included poster in the package file name, along with my abbreviated creator name RLH. After you’ve named it, select Save.
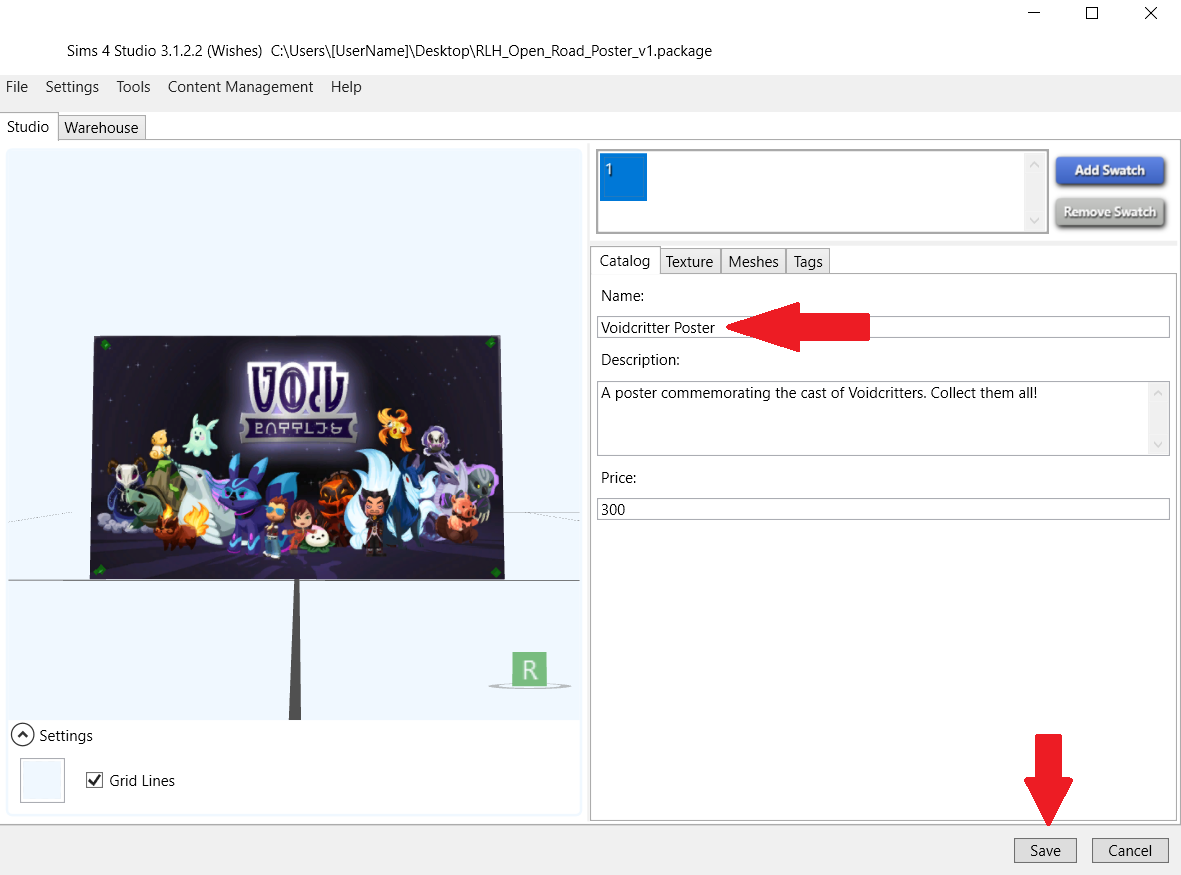
Step 4 – You should see the Studio window open (similar to above). Under the Catalog tab (the top red arrow) type in the name of your project. This is the name you will see in the build/buy catalog so choose wisely to make it easier to find in search (So for example, I changed the name of my project from Voidcritter Poster to RLH_Open Road poster. In the Description field, type in anything you’d like that will again show in the build/buy catalog in game. You can change the price or leave it as is. When you’re happy with it, select Save.

Step 5 – Next select the Texture tab (top red arrow). Beneath the texture window you will see the green Export button, and blue Import button. (For this tutorial those are the only buttons you need to worry about. Ignore the buttons under Catalog Thumbnail for now. Instructions on creating one of these has been covered in a previous tutorial and a link for it can be found at the bottom of this screen). Select the green Export button (middle red arrow).
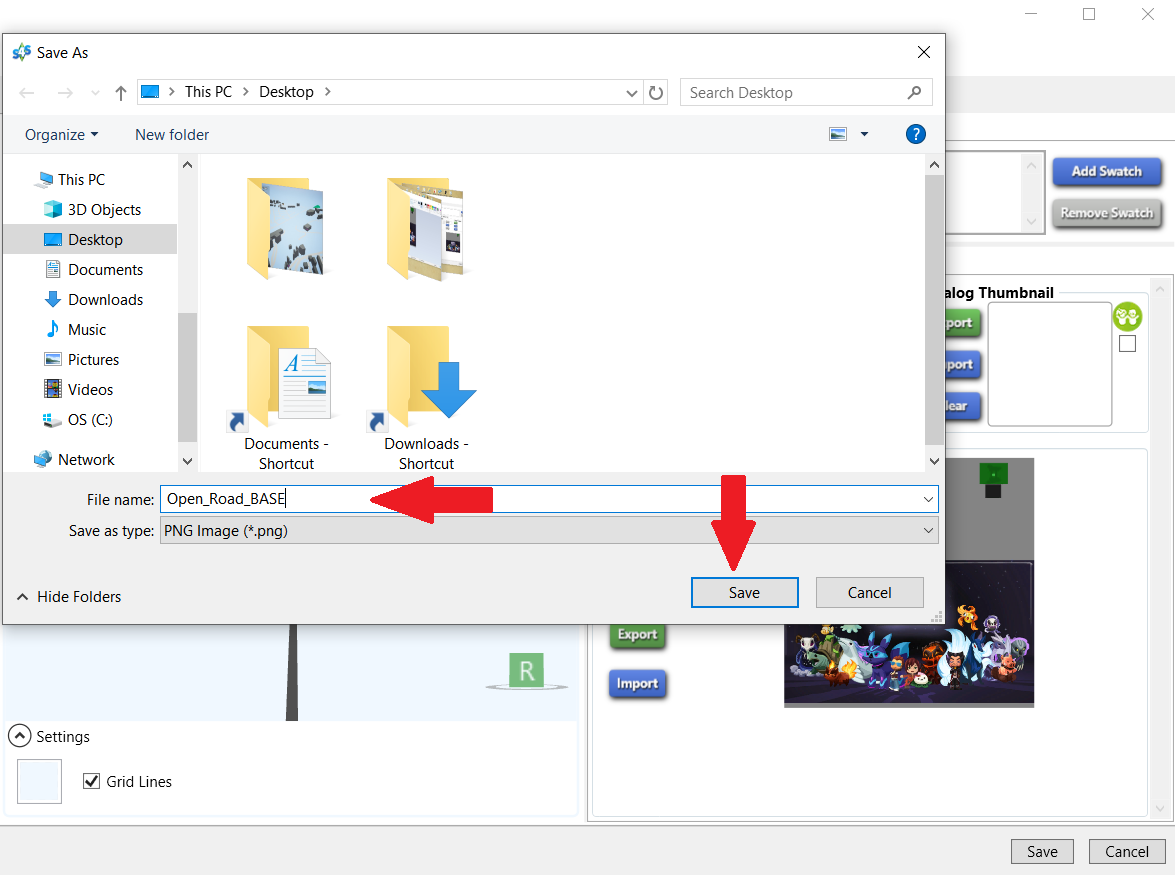
Step 6 – A window will pop up. Call your exported texture whatever you like as you will be editing it anyway. You don’t have to, but I always save it to desktop so that it’s easy to access. Then select Save.
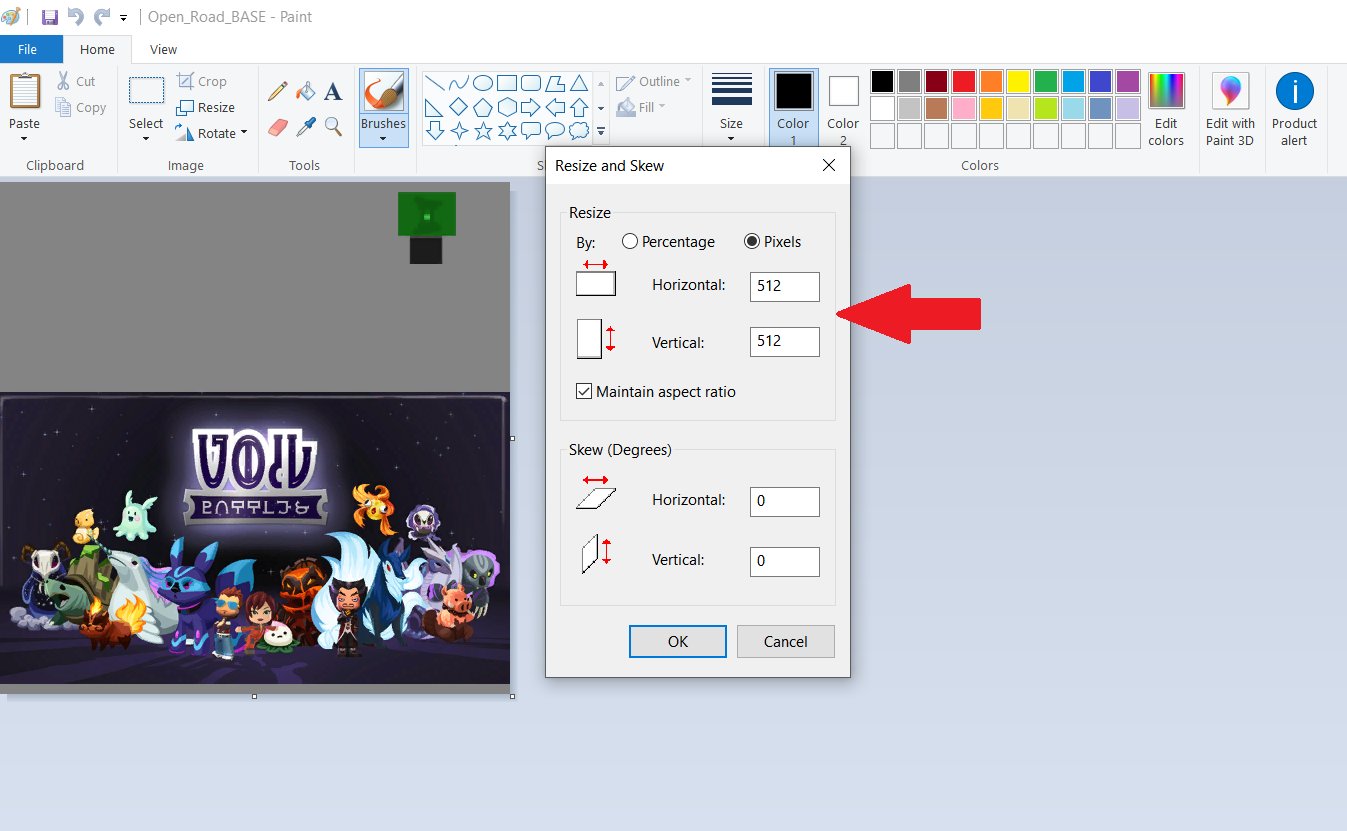
Step 7 – Minimize S4S and find your exported texture. Right-click and open it in MS Paint (or whatever editing program you wish). Resize your image to at least DOUBLE its original size. This ensures your image will appear clear in game. You can make your image 2048×2048 at max if you really want (don’t quote me on that), but I recommend against it. Generally 1024 pixels or less is more than sufficient for clear images, and won’t be so taxing on your graphics. After you have resized your image, select OK, then File > Save. Close Paint and open your newly resized export texture in Gimp.

Step 8 – If you haven’t got the option open already, press CTRL + L on your keyboard to open your Layers box. Right-click on your layer (right top arrow) and select ‘Add Alpha Channel’ (right bottom arrow. If the option is greyed out it means this is already available, so click anywhere to close that pop-up). On the left hand side (Toolbox) use Rectangle Select to select the part of the image we’re going to replace (the image in the red box). Try and stick to the image border lines as closely as possible for a cleaner recolour.

Step 9 – Once you have selected the image, press Delete on your keyboard to remove it. The image should now be replaced by an alpha/invisible window. Once you see this, go to Select > None.
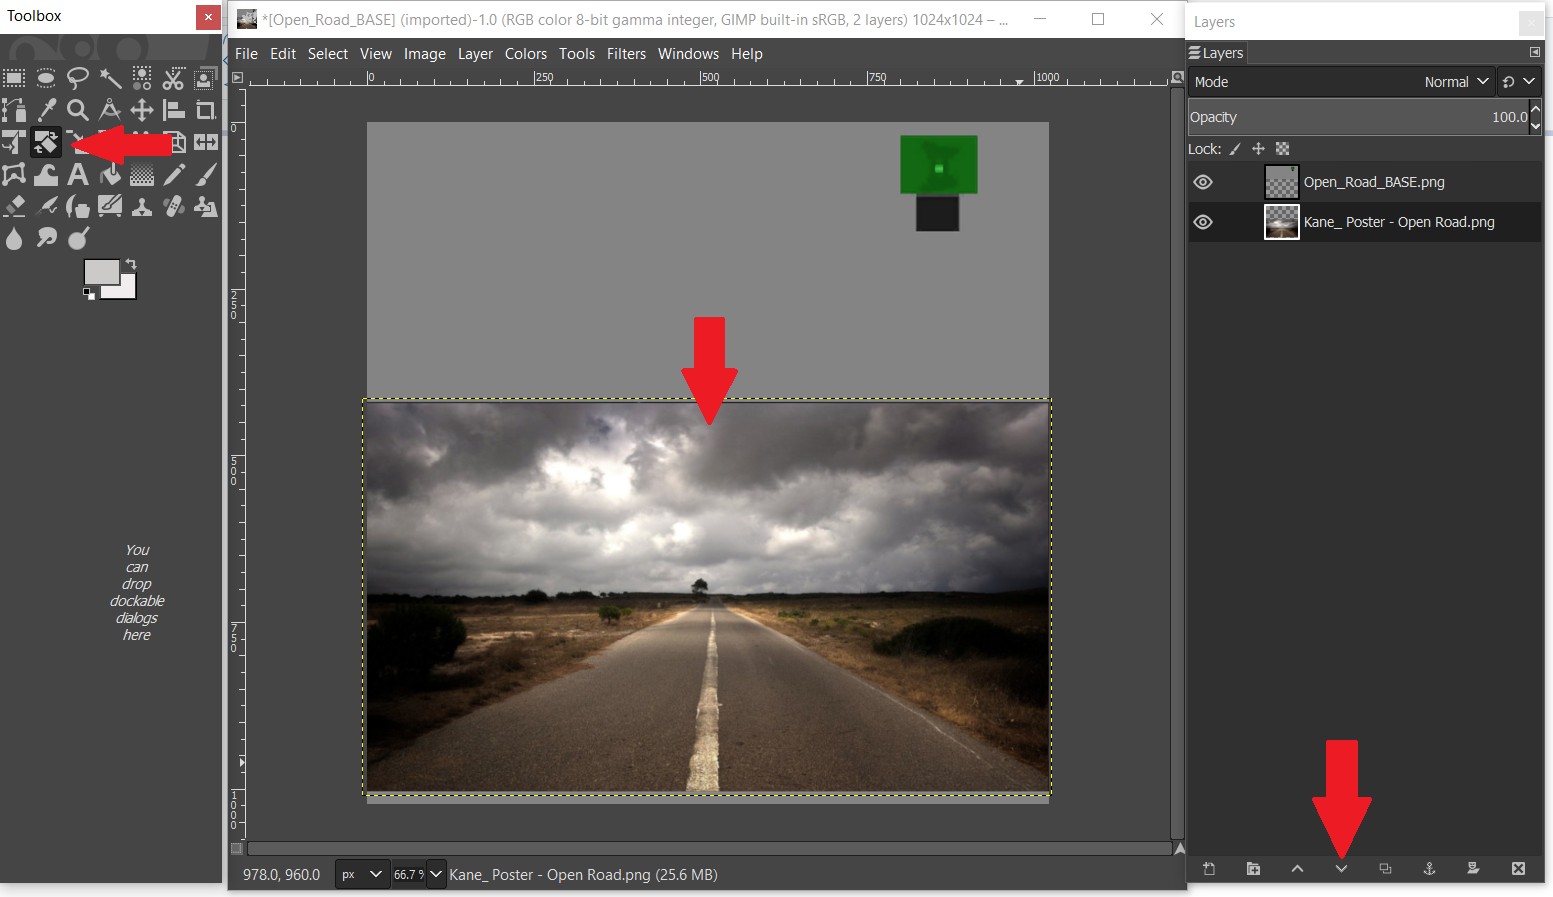
Step 10 – Drag your image from the desktop (or wherever you saved it) and drop it directly onto your poster. Use the Move Tool and Scale Tool to fit. Make sure it fits into that section that we previously deleted in step 9.
Optional: If your editing program allows layers, lower your image beneath the poster by selecting the Lower button (arrow down – beneath the red arrow on the bottom right hand side of the example picture). This will ensure part of the image doesn’t accidentally show on the back of the poster. This is optional however, as not all picture editing programs use layers.
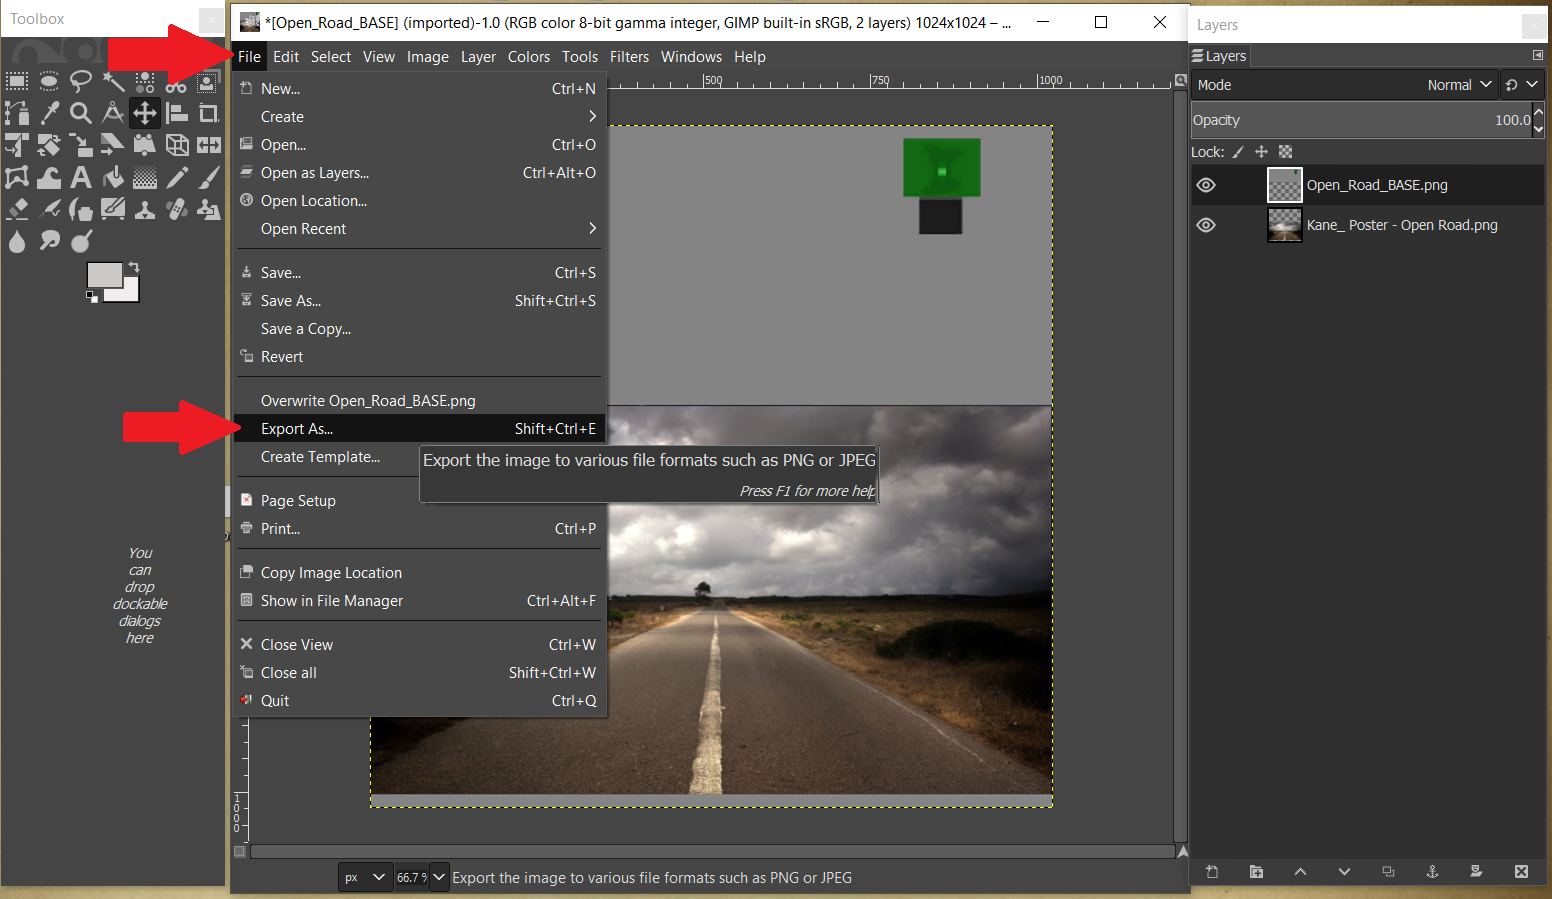
Step 11 – Once you are happy with the placement of your image, select File > Export As (In Gimp: if you try to Save As you will save an .xcf file which S4S won’t read. Export As saves the file to a .png which is ideal. If using another program, ensure the texture is saved as either .png or .jpeg). Again, ensure the image is easy to find. By default, I save to desktop.
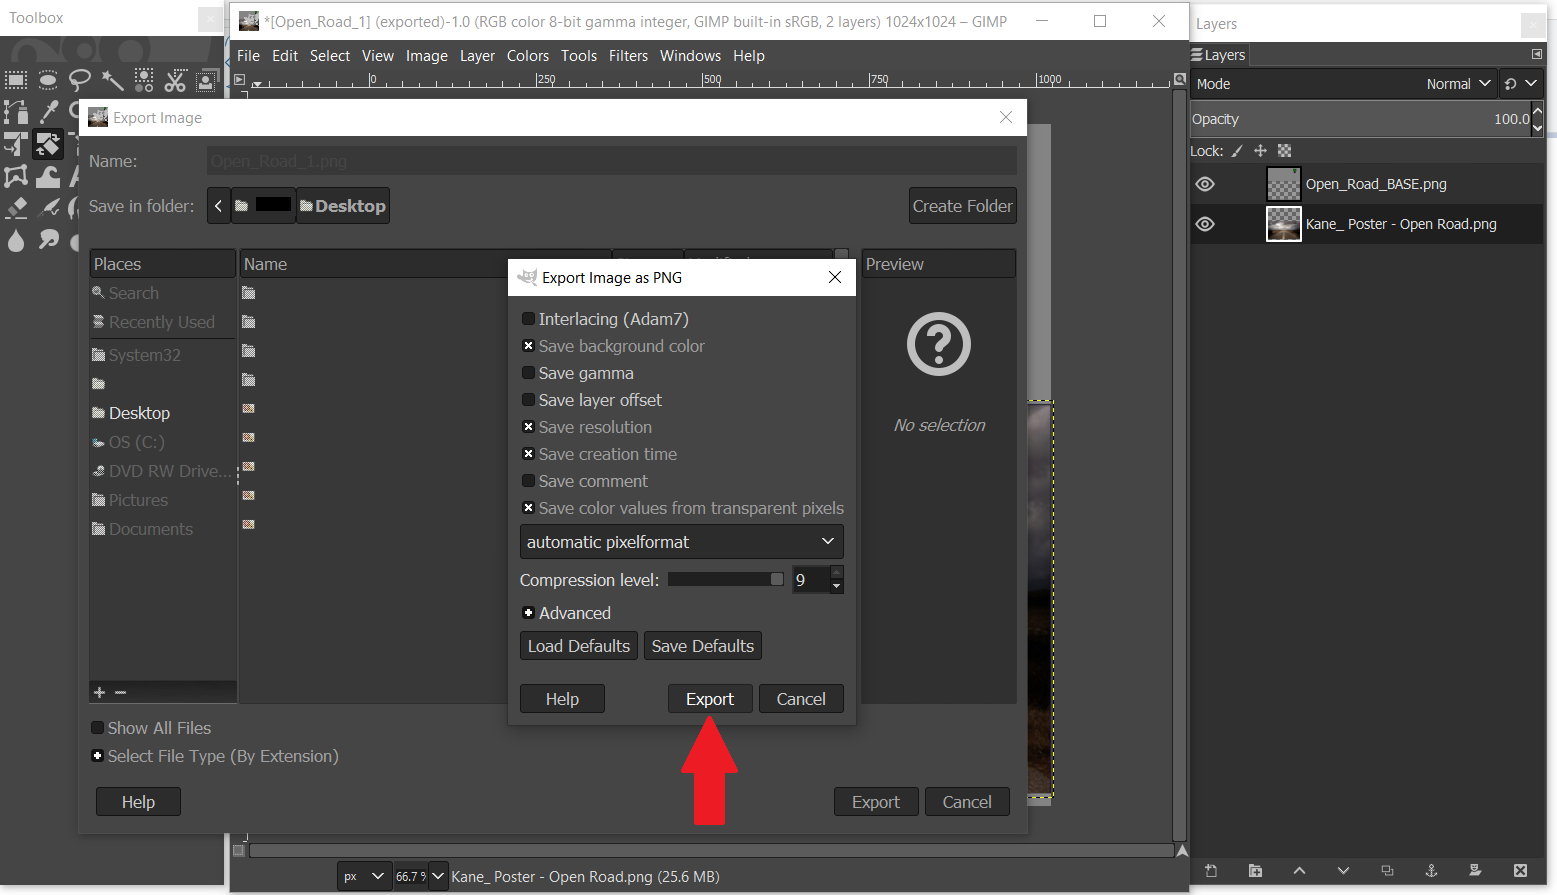
Step 12 – When a window pops up, Select the Export button. Then close Gimp.
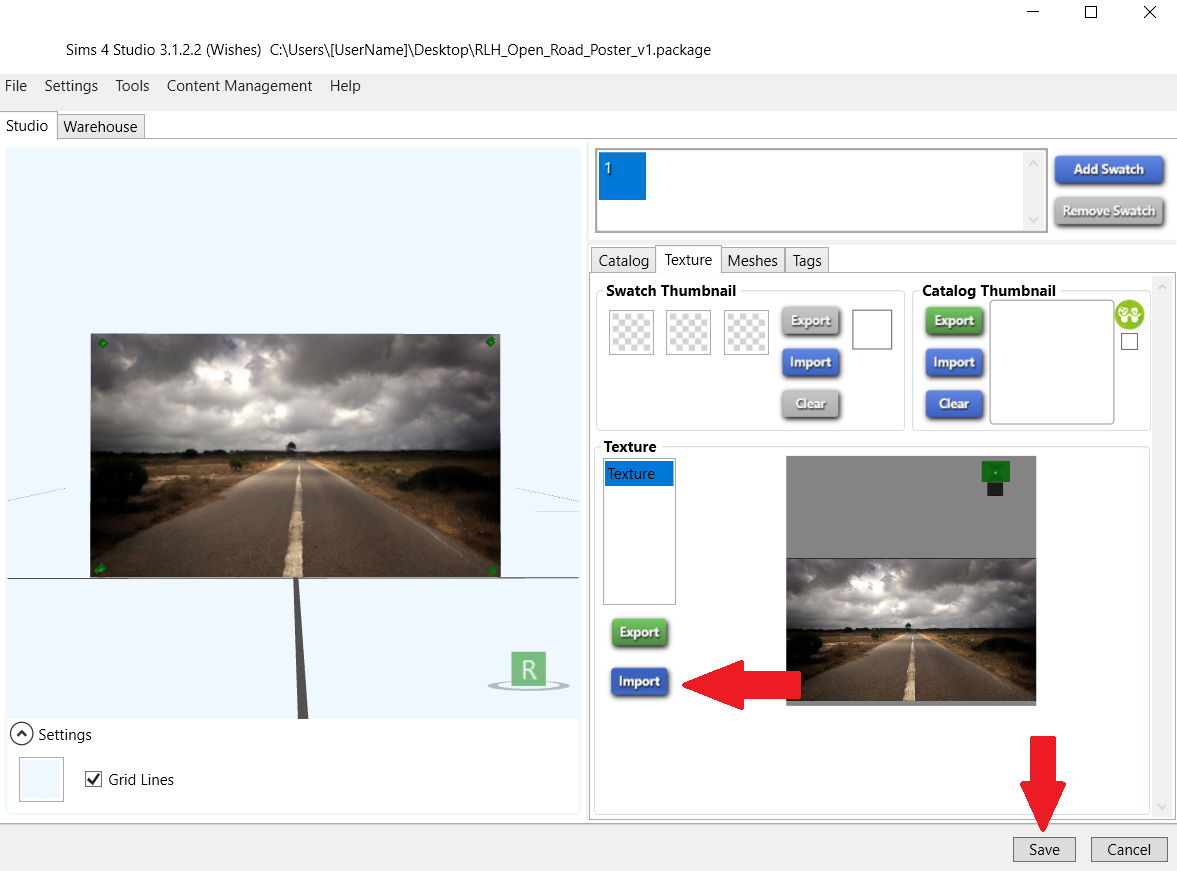
Step 13 – Return to S4S (which we minimized in step 7). Select the blue Import button. Navigate to your image and select Open. You should immediately see the 3D poster example (on the left hand side) change from the original texture to your new edited texture. To inspect more closely; hold down the right mouse button and drag to rotate your object, scroll wheel mouse to zoom in/out, and hold the mouse button and drag to move poster around window. If you’re not happy with the image placement, or you wish to make changes, minimize S4S and re-open your image in Gimp. Repeat steps 11-13 until you are happy. To finish, select Save.
Step 14 – Close S4S and open your Mods folder (Documents \ Electronic Arts \ The Sims 4 \ Mods). Drag and drop your .package file in there. Then load your game, and search your build/buy catalog to test.
One last thing: If you want to make a custom thumbnail swatch for your new object (either to give your recolour a more “polished” look, or to make it easier to see in the build/buy catalog), see the previous tutorial here.
So that’s it! Hopefully this helps someone, even though it’s pretty basic. I’ll probably write another guide at some point to cover multiple recolours and images on a single object (for example, family photos with multiple coloured frames), but a lot of that was covered here. It’s a matter of adding new swatches and repeating the same steps above for each recolour – but I’ll likely go into more detail with another post later. Anyway, as always, good luck! 🙂


You must be logged in to post a comment.